Being a Software Engineer, I have always known all there is to know about software, UI, OS tweaks, and all that fun stuff. I only worried about hardware when it came to minimum requirements to run games or other tools.
Until recently, when I realized playing on my Xbox One is not good for FPS games, especially that I developed an affinity for Apex Legends and was almost not too bad at it.
I needed a gaming PC.
Gaming laptops are out of the question, too expensive, and the good ones are too heavy to even carry around, plus I won’t really need to carry mine around since I only play at home.
I needed to build a desktop gaming PC. Which I did!
Behold Saitama:
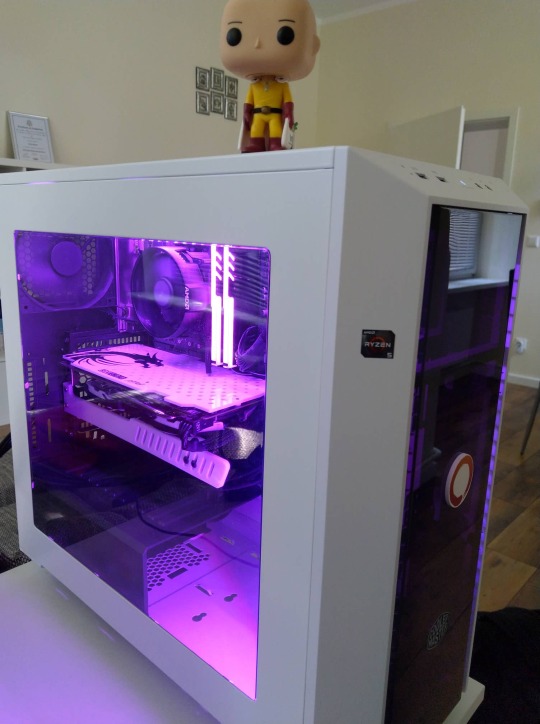
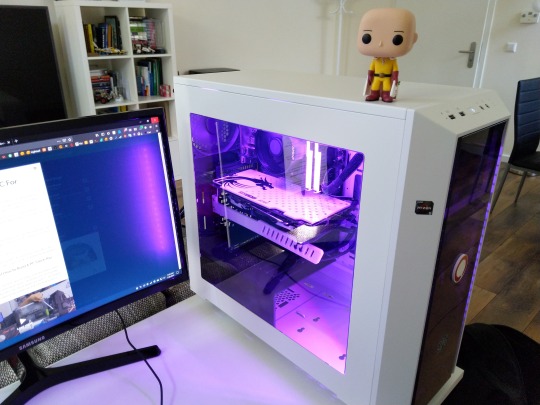
You can find the specs and pics here: https://de.pcpartpicker.com/b/XJ3bt6
The idea behind the name was that this would be a badass gaming PC despite its being not much of a looker, like Saitama is. I ended up adding LED strips and RAM heat sinks, as well as a custom backplate for the GPU so I guess I kind of defeated the purpose of the name there.

Where did I start? I didn’t even know the budget I would need to allocate or the pieces to buy or even how to match specs and check compatibility of hardware.
Start Here: The Parts, And How to Build A PC Once You Have Them?
A great resource to answer this question was to simply look at youtube videos of people doing an “end to end gaming pc build”. Inevitably, you end up with beginner guides that are pretty extensive about what each part is, and how to correctly install it. I would recommend this particular video for that purpose:
Next Step: Which Parts To Choose?
For this one I have a more original recipe.
First of all, decide on your budget: how much money are you willing to spend? It is common these days that anything around 500$ US / 500€ EU could be enough to have a decent gaming PC that can run all the new games, albeit with different framerates depending on the graphics card you choose.
In-game framerate is an important metric, because it is like your bottom line as a gamer: the higher it is, the smoother your gaming experience is. It is expressed in FPS (Frames Per Second), or how many images your PC can render in one second.
Next, start looking at builds recommended for that budget: again here, some key phrases I recommend for a quick youtube search would be “<your budget here><$ or €> gaming pc build”, example: “500$ gaming pc build”. Joey Delgado has a great channel that offers these kinds of videos in a very nice format, so I recommend you check it out. This is such a typical gaming pc build title that soon you will drown in these videos, kind of like I did. But that’s a good thing, because they each show different aspects: the target performance aspects (gaming vs video editing vs 3D design etc.), the different tradeoffs (noise, budget, good FPS, fast loading times, etc.). You will also notice, the budgets can go from 500$ to 3000$ and more!
At this point, you’re ready to create a parts list. The best website to do so is hands down PC Part Picker.
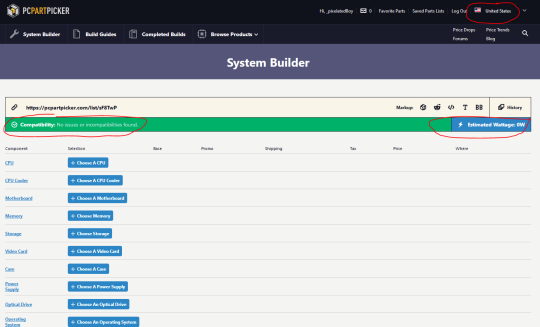
This is a website that allows you to create builds and checks hardware compatibility issues for you! which is a great plus for an absolute hardware n00b. While you’re building your part list, you also get suggestions on the cheapest place to buy them , build guides , builds of other users in the community , etc. To make informed decisions about the specs of the hardware you buy, I recommend taking a look at videos like the one below, which explain what to look for in the specs of a PC part you’re planning to buy:
Once you have a nice list, where:
- Wattage provided by your power supply is safely above the total of your parts’ consumption number (also think about if you want to improve this build in the future, a scenario where you might require even more power)
- Components are compatible (be careful about the fact that PC Part Picker does not provide that information for geometric clearances. I personally recommend buying a huge case for the first build, which is the most flexible and easiest way to do a build that you can extend later)
Order your components, and you can now get building!
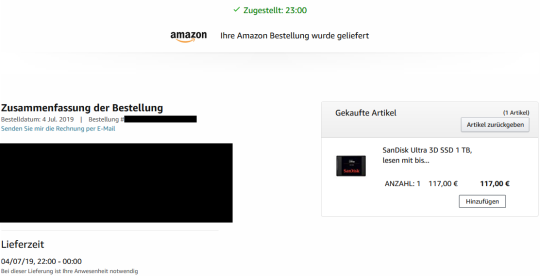
(funny story, this build was for my birthday, I got all components on time except I forgot to order my 1TB SSD, which made me very mad that I won’t have my PC ready that night. I ordered it - just an ssd drive - on Amazon Prime Now)
Build Night
You will need:
- A clean large enough surface
- A 2 Philips screwdriver
- Some zip ties to manage your cables cleanly, sometimes these are delivered with your case
- A mental readiness to rtfm
Make sure you try to optimize your cable management. As a n00b myself I did an okay job, although less than three weeks later I am considering redoing the whole thing again.
Here’s a good guide with useful tips for good cable management:
Extras, Looks And Modding
If you are like me and would like your PC to look fly, you can do some extra work to make it look nice.
- Install LED strips, heat sinks and fans: of course the best approach would be to buy components pre-equipped with this feature although it is not the best idea from a cost point of view
- Color matching: if you play it right, your PC case will match nicely with your components from a color point of view. Of course you can always fix this later but it is better to choose components with color matching in mind where a choice is possible initially.
- Figurines? Figurines! You can install these inside the case to give it extra swag, especially if it matches the LED colors/case colors. A good example of this is a video I really like from Joey Delgado here: https://www.youtube.com/watch?v=98ujnl1_hW0
- In case you have an ugly GPU (from the back side) you can get a custom GPU backplate for relatively good prices, other swag elements are available such as GPU support brackets which prevent gravity from making your GPU “saggy” (ew). It goes without saying I recommend ColdZero since I used their stuff and I found it excellent!
Done! Start Regretting Choices And Thinking About Upgrades
This is kind of inevitable, at least from my experience. Once you get a taste, you won’t be able to stop, and you’ll be thinking of improvements all the time. Congrats, you got a new hobby!